
 Wiele osób pytało mnie "Jak robisz te wzorki?!" - chcę więc dziś pokazać Wam, jak wygląda krok po kroku zdobienie paznokci z pomocą zestawu Konad. Miłego czytania! (Wybaczcie kiepskie zdjęcia - musiałam robić je sobie sama, a to nie takie łatwe ;) No i mój aparat to grat -.-)
~~~~~~~~~~
Many people have asked me "How do you make these patterns?!" - so today I want to show you how it looks: decorating nails with the use of a Konad set - steb by step. Enjoy! (Sorry for the bad photos - I had to do them myself and it's not so easy ;) And... my camera sucks.)
 1. Na początek potrzebujesz kilku rzeczy: płytki z wzorkami, stempla, czyścika, gęstego lakieru, wacika ze zmywaczem i gazety (jako podkładka). Najlepiej, żeby oryginalny był przynajmniej stempel.
~~~~~~~~
At first, you need a few things: patterns plate, stamp, scraper, thick polish, remover on a cotton swab and some newspapers (as a pad). You should have at least the original Konad stamp.
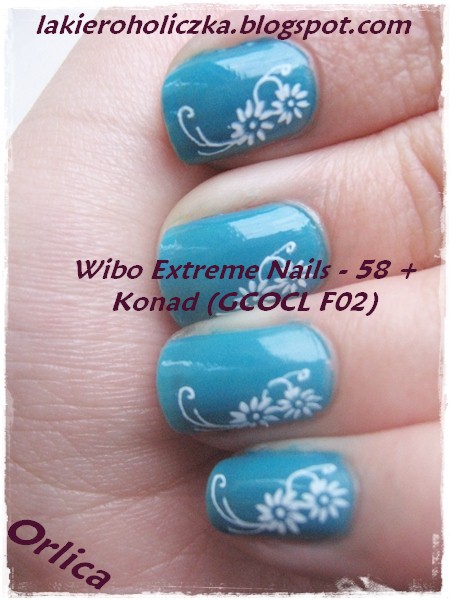
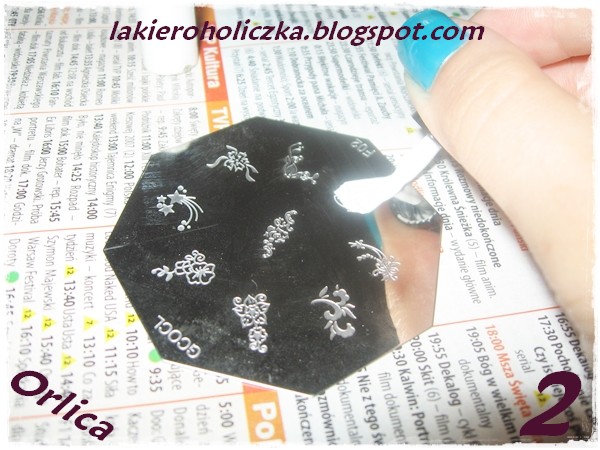 2. Paznokcie są już pomalowane bazowym lakierem - u mnie to turkus. Teraz trzeba innym lakierem dokładnie pomalować wybrany wzorek na płytce.
 ~~~~~~~~
Nails are already painted with base polish - for me it is turquoise. Now we have to paint on the plate with another polish (white, for me) to cover a whole pattern we chose.
 3. Od razu bardzo szybko ściągamy nadmiar lakieru za pomocą metalowego czyścika - możemy też użyć np. karty płatniczej.
~~~~~~~~
As fast as we can, we have to pull off the excess of polish using a metal scraper - for example, we may also use a credit card.
 4. Wtedy przyciskamy mocno stempelek do wzorku na płytce. Trzeba robić to naprawdę szybko, żeby lakier nie zasechł.
 ~~~~~~~~
Then we the press the stamp to the pattern on the plate. We must do it really fast, cause polish shouldn't go dry.
 5. Wzorek jest już odbity na stemplu. Teraz trzeba szybko przenieść go na paznokieć - po prostu mocno przycisnąć w odpowiednim miejscu na paznokciu.
 ~~~~~~~~
Pattern is already printed on the stamp. Now we need to quickly move it to the nail - just firmly press it in right place on the nail.
 6. TADAAAM! Wzorek jest gotowy! Teraz musimy wyczyścić zmywaczem płytkę i czyścik i powtórzyć całą procedurę dla kolejnych paznokci. Takie zdobienie wymaga wprawy, ale wszystkiego da się przecież nauczyć :)
~~~~~~~~
TADAAAM! Pattern is ready! Now we have to clean the plate and scraper by remover and repeat the entire procedure for the next nails. Such decorating needs practice, but everything can be learned after all :)
musze pocwiczyc;)
ReplyDeleteMasz oryginalnego Konada? Pokaż kiedyś jakieś swoje wzorki :)
ReplyDeleteSzybko Ci poszło :) ja mam jeszcze problemy w robieniu wzorków, ale trzeba będzie poćwiczyć :D
ReplyDeletePochwalisz się jakimiś? :)
ReplyDeleteCo mi poradzisz gdy wzorki się nie odbijają na stempelek ?
ReplyDeleteA masz oryginalne konadowe? I stempelek?
ReplyDelete